Click here to view as a pdf: Reviewing Proper Milking Procedure
By Kelly Hubert, B.S.
There may be a time on every farm where the milking protocol is not implemented or followed properly. This could be the result of a person in a hurry to finish chores or a new employee still learning proper protocol. It is important to follow proper milking procedures which can lower somatic cell counts, increase milk production, help earn better premiums and increase overall profit.
Proper Milking Procedure Tips
Provide a low stress environment: A cow that feels stressed will release adrenaline. Adrenaline inhibits the release of oxytocin, the hormone which stimulates milk let down. Refrain from yelling or making sudden movements as cows enter the barn or parlor to reduce adrenaline release. Cows like consistency so keep the milking routine as close to the same as possible for each milking.
Wipe off the teats: Start the milking procedure by wiping off the teats with a clean, dry towel. This will remove any organic matter from the udder. Failure to remove dirt, manure, or organic matter will inhibit teat dips from disinfecting the teat. Make sure to use a new, dry towel for each cow so bacteria are not spread from one cow to another.
Pre-dip: Pre-dip to disinfect the teat. Ensure the teat is completely covered. Sprayers do not effectively cover the entire teat. Even though a dipper may use more product than a sprayer, it can pay for itself with less mastitis cases. Using a non-return dipper can reduce the spread of contaminates. Allow the pre-dip 30 seconds of contact time to work effectively1. Removing the dip too early, may not allow the dip to properly disinfect the teat.
Forestrip: Remove 3-4 squirts of milk from each quarter. Forestripping helps check for abnormalities and removes the milk containing the highest somatic cell count. Strip milk into a strip cup, not the floor or stall. This helps prevent stalls from becoming contaminated and makes it easier to evaluate for abnormalities such as flakes.
Wipe the dip off: Make sure the teat end is clean and dry. One way to test this is by using a paper towel to press up on all four teat ends.2 Refer to Dr. Leiterman’s article, in the August, 2008, Crystal Creek® Newsletter, “Clean Teat Ends, Healthy Udders.” If the teat end is still wet, there is a high probability of bacteria being introduced into the udder during milking. This step also helps to stimulate milk let down.
Attach the milker: The milking unit needs to be on the cow within 1 to 2 minutes from the start of the prepping process1. Attaching the milker in this time frame takes full advantage of the oxytocin that is released, creating better milk let down. Make sure the milker is attached squarely on the cow’s udder to ensure proper milk flow and prevent squawking. 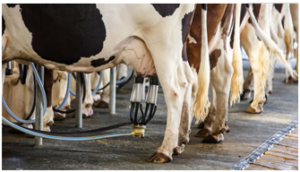
Post-dip: Completely cover the teat with teat dip. Post-dip immediately after the unit is removed to protect the teat end until it closes after milking, which may take 10-15 minutes. Pushing up feed after milking will encourage cows to stand, preventing bacteria from entering the teat and allowing the teat end time to close. In extreme cold weather, allow the teat dip 30 seconds of contact time and blot dry any excess dip to help prevent chapping and other cold weather issues3.

Additional Tips
Clean out dip cups: Clean out dip cups each day to reduce the risk of transferring bacteria from cow to cow.
Wear gloves: Wearing gloves helps to reduce the spread of pathogens, specifically Staph. aureus. The number one cause of Staph. aureus mastitis infections is ungloved hands.
Prepping Order: If prepping a group of cows at one time, make sure to keep the same order of the cows for each step. Example: pre-dip and forestrip cows 1 through 5 then wipe cows 1 through 5 (not 5 through 1 as this will change your dip contact time and the timing to attach each milker).
Culture: Sample the bulk tank no less than quarterly and culture high SCC cows as they occur, to determine the cause of any problems. Cows with mastitis, especially Staph. aureus or Mycoplasma, should be milked last so they are not spreading bacteria to other cows in the milking line. Cows with Staph. aureus or Mycoplasma should be culled from the herd.
Take the time to analyze milking procedures on your farm and periodically review them with your employees. Maintaining consistent procedures can help provide optimum milk production and profitability on your operation.